Testing (Testnet) Guide
Introduction
Welcome to the AkashicPay Testnet guide! This guide will walk you through the process of testing AkashicPay’s features in a safe, simulated environment before deploying on the mainnet. The testnet allows developers and users to experiment with transactions, smart contracts, and other functionalities without risking real crypto assets.
What is the AkashicPay Testnet?
The AkashicPay Testnet is a testing environment that mimics the mainnet but uses test tokens and testing environment instead of real cryptocurrency. It is designed for:
- Developers testing integrations.
- Users familiarising themselves with AkashicPay’s features.
Prerequisites
Before you begin, make sure you have:
- Access the AkashicPay Testnet Dashboard
- Install AkashicLink (Testnet) if you haven’t already.
- Visit testnet.akashicpay.com and log in using your AkashicLink (Testnet).
- Complete the onboarding process to gain access to the testnet environment.
- Generate Your API/SDK KeyPair
- Navigate to KeyPair Management in the Settings.
- Click "Generate KeyPair" to create your API/SDK KeyPair.
- Securely store your API/SDK KeyPair — they will be needed for integration.
- Configure Callback URLs (Webhook Setup)
- Go to the Callback Settings page in Developers.
- Enter your Callback URLs where transaction notifications should be sent (e.g., for deposit confirmations).
- Save the settings to ensure real-time updates during testing.
Next Steps
In the following sections, we’ll cover:
- Creating test deposit addresses.
- Executing test transactions.
- Finding the Testnet on your third-party wallet.
- Testcoins faucet.
Testing
Testing AkashicPay on Testnet: Step-by-Step Guide
- Create a Test Deposit Address
- Refer to the AkashicPay SDK or SecureAPI documentation to set up a test environment.
- Generate a deposit address on either:
- Tron (Shasta Testnet)
- Ethereum (Sepolia Testnet)
- BNB Smart Chain (BNB Smart Chain Testnet)
- Solana (Solana Devnet)
- This simulates an end-user’s deposit address in a production environment.
- Send a Test Transaction
- Using a compatible wallet (e.g., MetaMask for Sepolia and BNB Chain, TronLink for Shasta, Phantom for Solana etc.) loaded with testnet tokens, send a small transfer to the testnet deposit address you generated.
- Monitor the transaction:
- Check the AkashicScan testnet block explorer.
- Verify that the callback URL receives a confirmation.
- Confirm the deposit reflects in your AkashicPay Testnet dashboard.
- Monitor the transaction:
- Using a compatible wallet (e.g., MetaMask for Sepolia and BNB Chain, TronLink for Shasta, Phantom for Solana etc.) loaded with testnet tokens, send a small transfer to the testnet deposit address you generated.
Where is the Testnet on a third-party wallet?
Tron-SHASTA
Open a Compatible Wallet and navigate to the Testnet:
- Use a third-party wallet like TronLink (for Tron Shasta Testnet).
- Ensure you’re connected to the correct testnet by following the screenshots below.
- If you have requested the testcoins to the Tron address you generated from TronLink, they will appear here after you have switched to the Testnet.
Desktop Chrome App
| Open your TronLink and select the dropdown at the header -> | Select TRON Shasta Testnet |
|---|---|
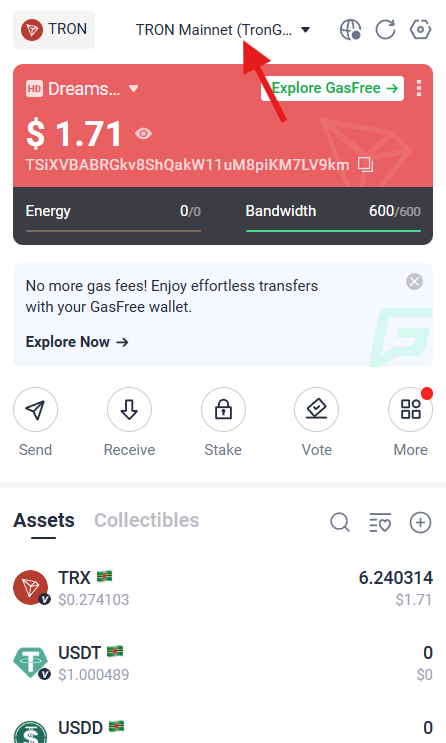 | 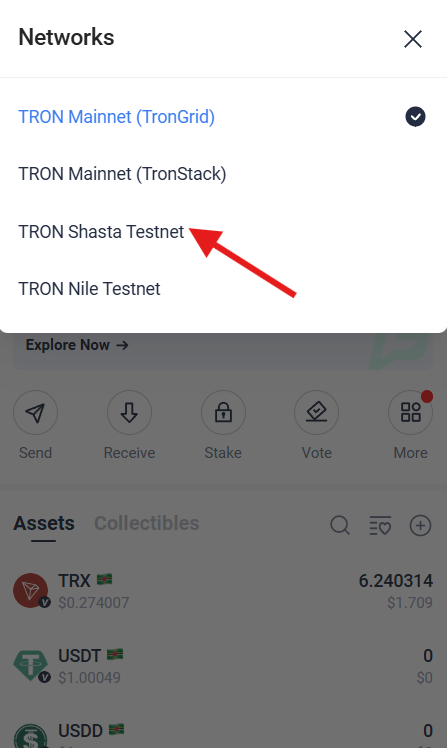 |
Add the USDT testcoin token address onto your TronLink
Navigate to the USDT (Tron-SHASTA) contract address: TG3XXyExBkPp9nzdajDZsozEu4BkaSJozs on TronScan Shasta Testnet. Click this button from the screenshot below and authorise with your TronLink to add the USDT testcoin onto your TronLink.
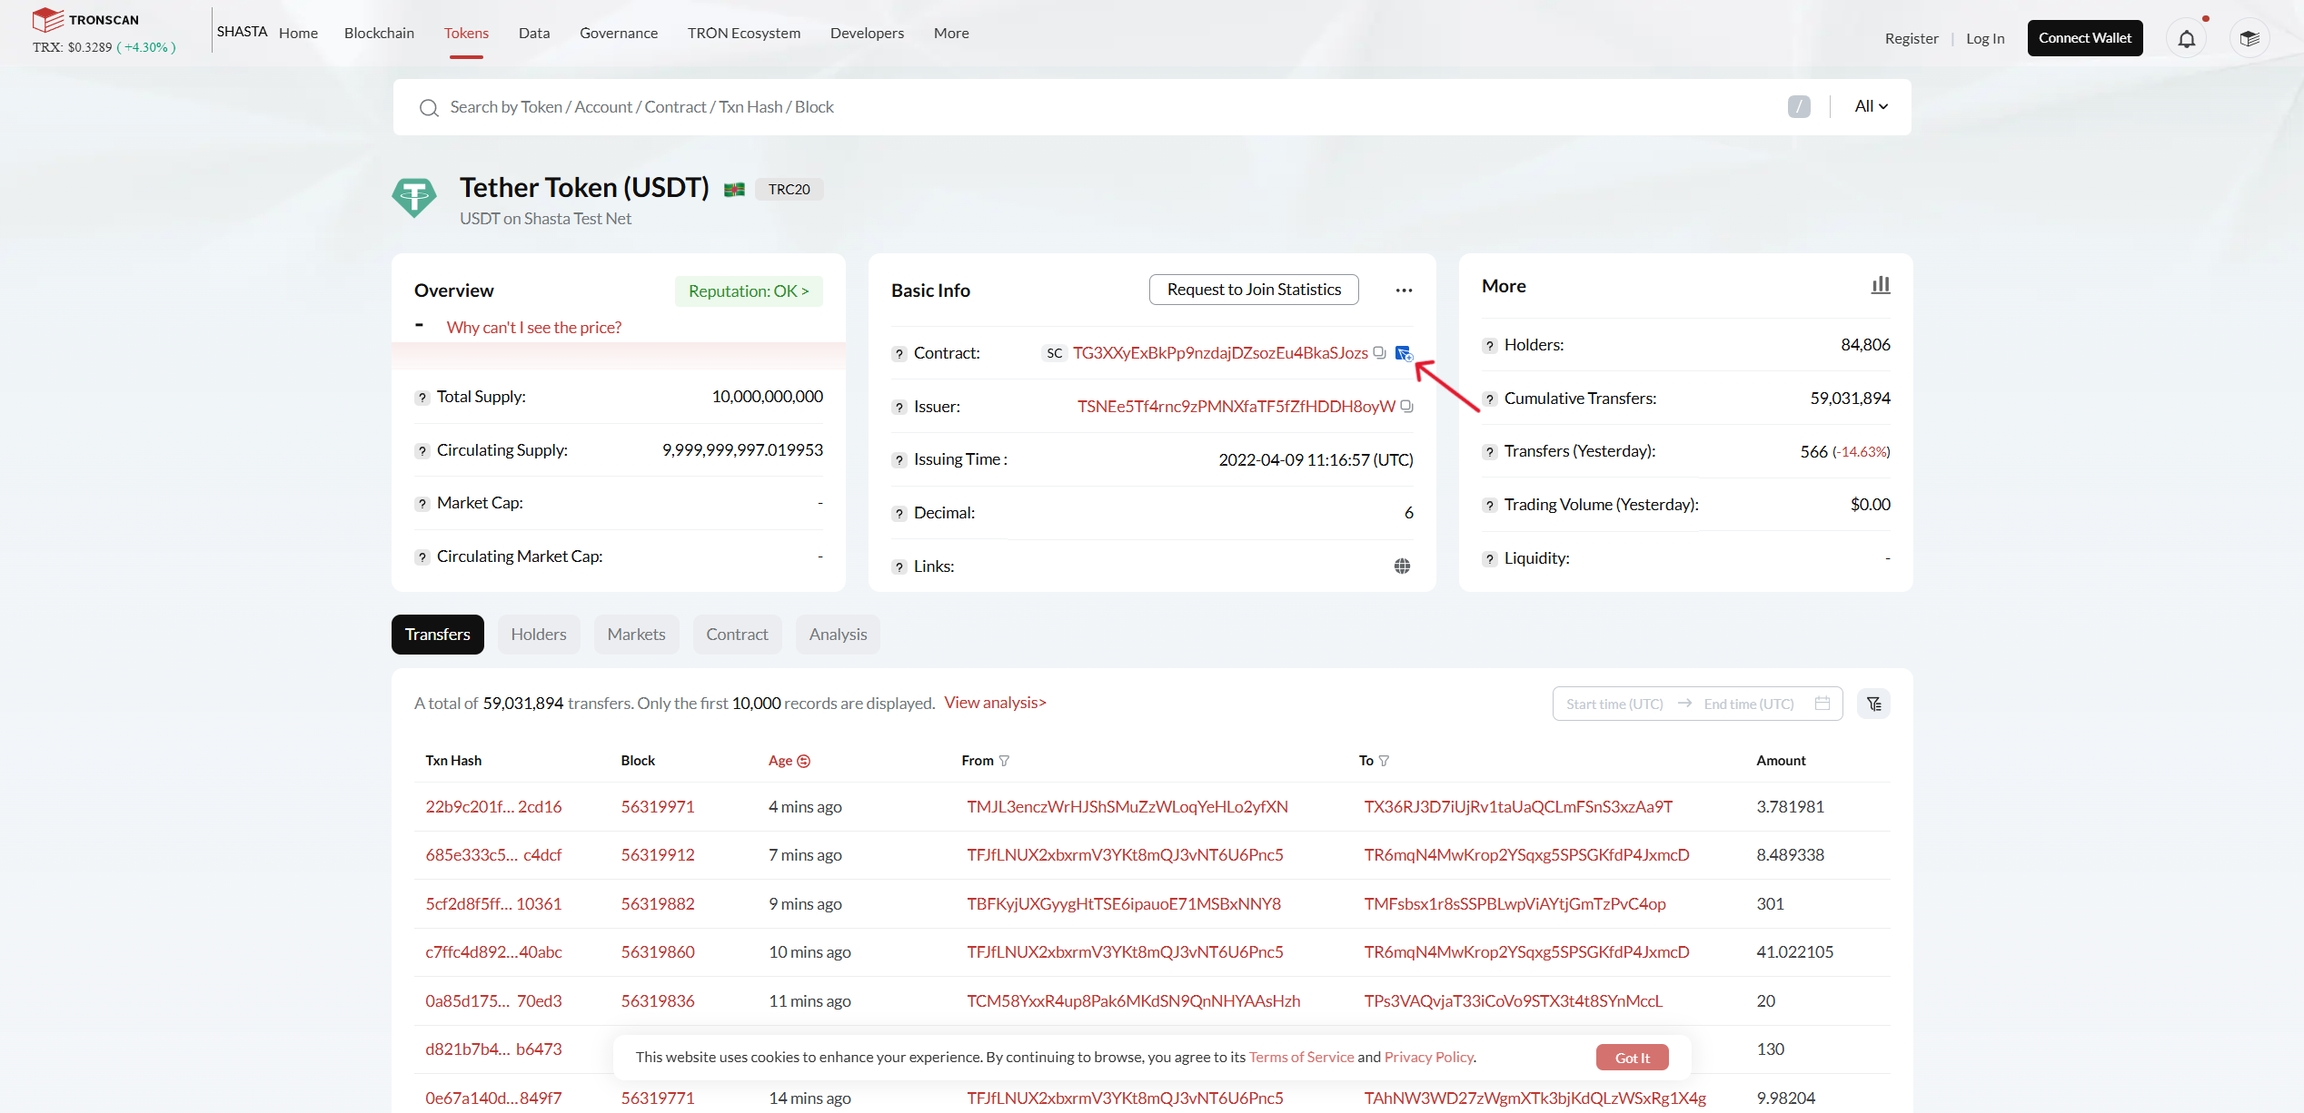
| Testcoin | Token Contract Address |
|---|---|
| USDT | TG3XXyExBkPp9nzdajDZsozEu4BkaSJozs |
Ethereum-SEPOLIA
Open a Compatible Wallet and navigate to the Testnet:
- Use a third-party wallet like MetaMask (for Ethereum Sepolia Testnet).
- Ensure you’re connected to the correct testnet by following the screenshots below.
- You can request testcoins directly from us. And if you already have previously, they will appear here after you have switched to Testnet and added the token address.
Desktop Chrome App
| Open your MetaMask and select the dropdown below the subgroup Tokens -> | Select Custom -> | Select Sepolia |
|---|---|---|
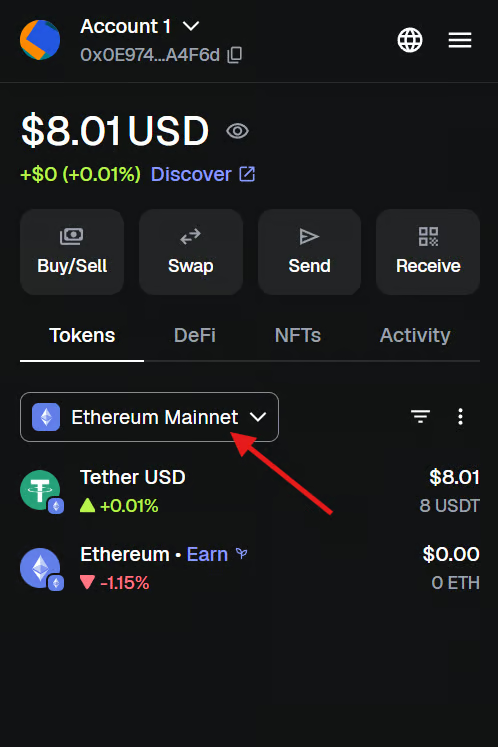 |  | 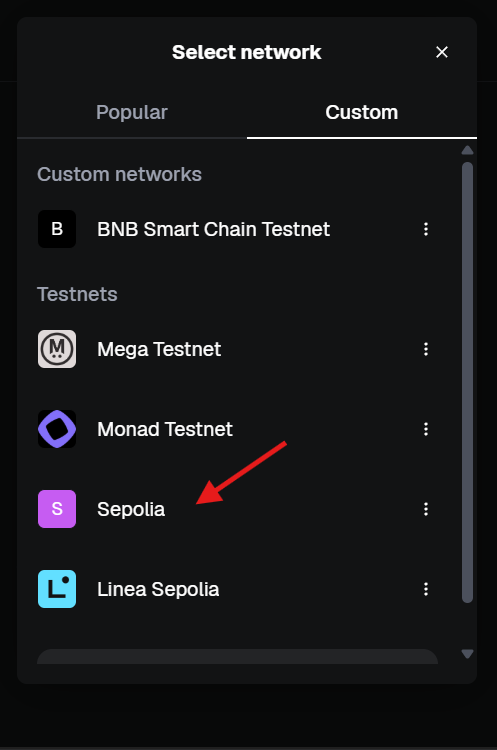 |
Add the testcoins token address onto your MetaMask
Navigate to your MetaMask to Sepolia Testnet. Import the contract address from the table below. Follows the steps from the screenshot to add the testcoins onto your MetaMask.
| Find and click the "⋮" in the wallet -> | Press "+ Import tokens" -> | Select Sepolia and input the token contract address |
|---|---|---|
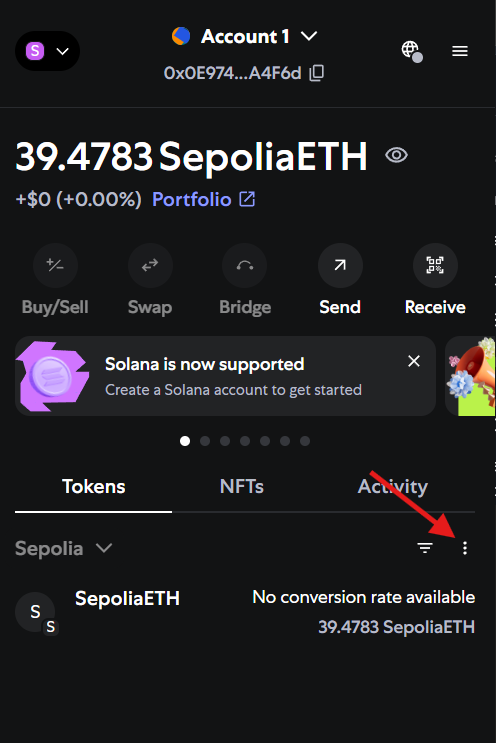 | 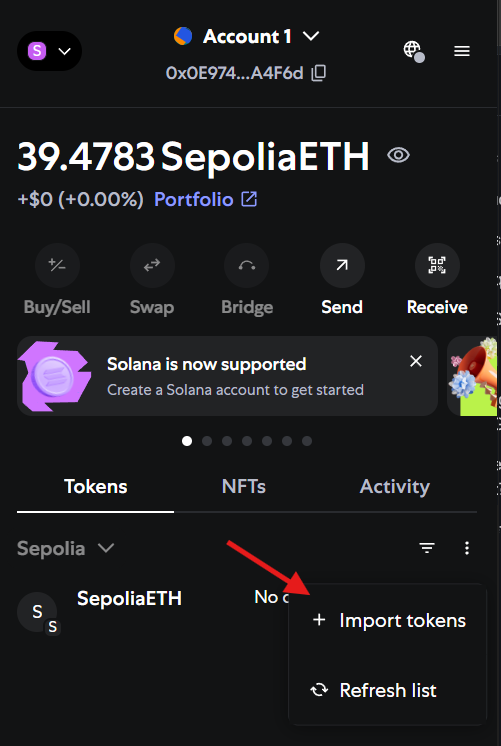 | 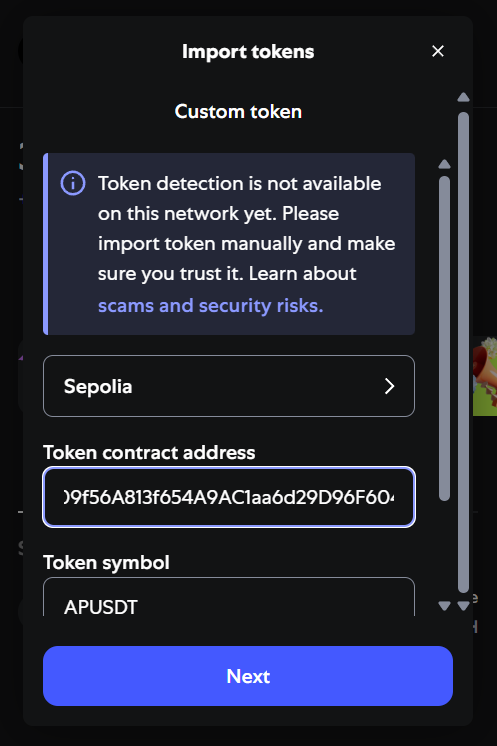 |
| Testcoin | Token Contract Address |
|---|---|
| APUSDT | 0xA62bE7Ec09f56A813f654A9AC1aa6d29D96F604e |
| APUSDC | 0x92Ac12b566954E3d0E966ccA7c9ddc44Ca80AE29 |
BNB Smart Chain (BNB Smart Chain Testnet)
Open a Compatible Wallet and navigate to the Testnet:
- Use a third-party wallet like MetaMask (for BNB Smart Chain Testnet).
- Ensure you’re connected to the correct testnet by entering the correct chain details and the screenshots below.
- You can request testcoins directly from us. And if you already have previously, they will appear here after you have switched to Testnet and added the token address.
Network Details
- Network Name: BNB Smart Chain Testnet
- New RPC URL:
https://data-seed-prebsc-1-s1.bnbchain.org:8545 - Chain ID: 97
- Currency Symbol: tBNB
- Block Explorer URL:
https://testnet.bscscan.com
| Navigate to "Enabled networks" -> | Press "+ Add custom network" -> | Enter the custom network details |
|---|---|---|
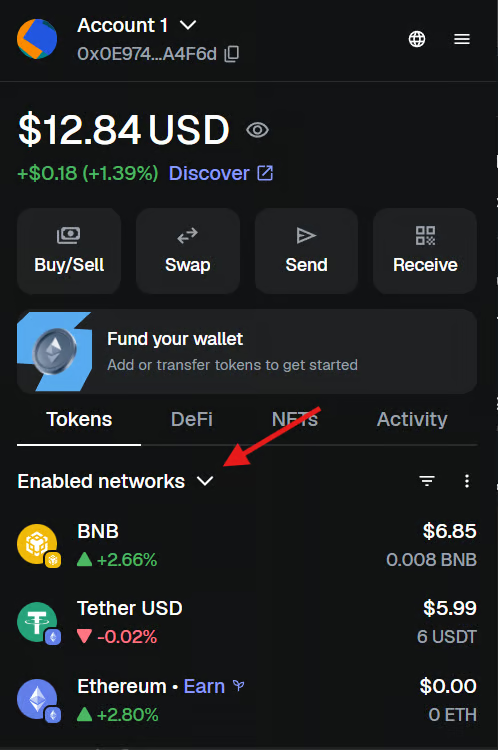 | 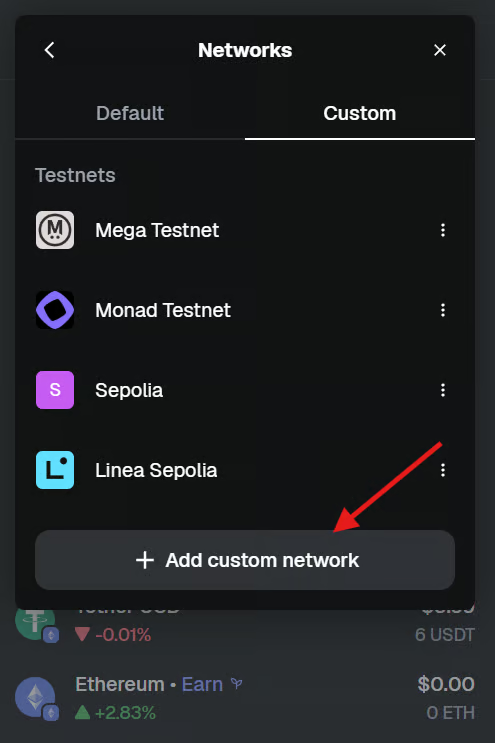 | 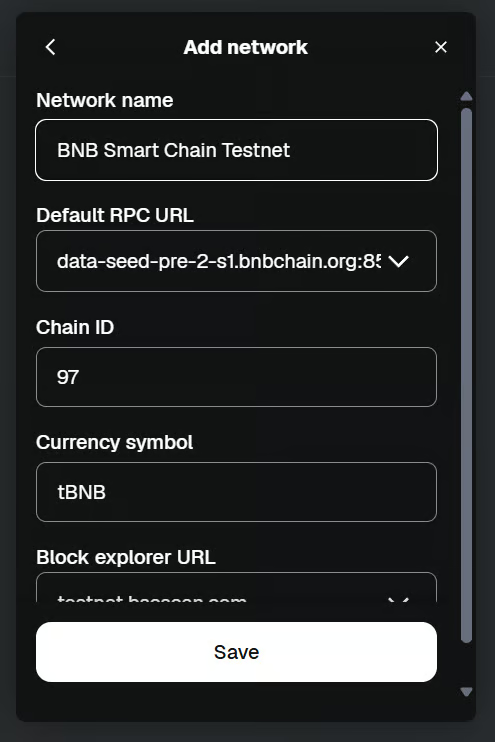 |
Add the testcoins token address onto your MetaMask
Navigate to your MetaMask to BNB Smart Chain Testnet. Import the contract address from the table below. Follows the steps from the screenshot to add the testcoins onto your MetaMask. Follows the steps from the screenshot below to add the testcoin onto your MetaMask.
| Find and click the "⋮" in the wallet -> | Press "+ Import tokens" -> | Select BNB Smart Chain Testnet and input the token contract address |
|---|---|---|
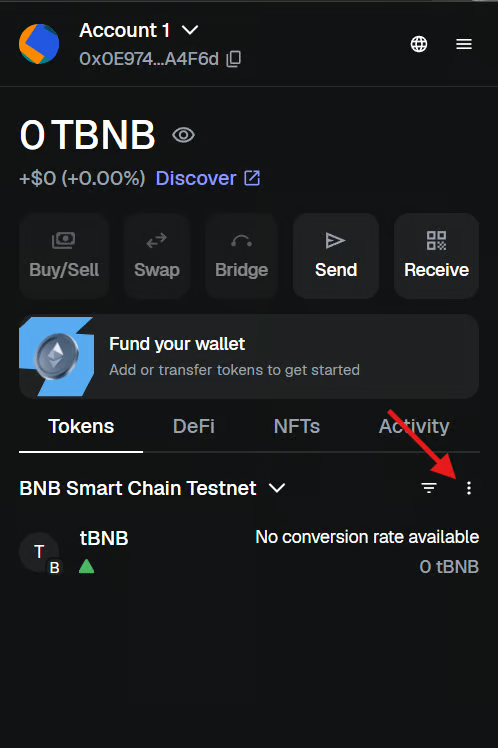 | 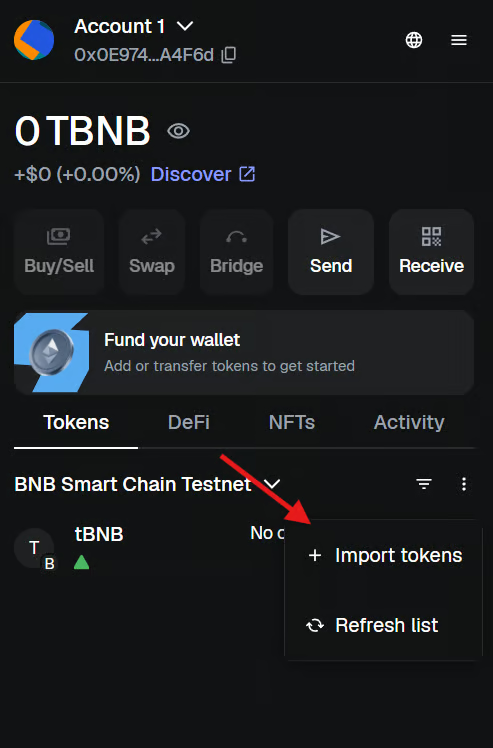 |  |
| Testcoin | Token Contract Address |
|---|---|
| USDT | 0xA62bE7Ec09f56A813f654A9AC1aa6d29D96F604e |
| APUSDC | 0x9114Eb6B5d281AE405C23082CF56043daC280cbA |
Solana Devnet
Open a Compatible Wallet and navigate to the Destnet:
- Use a third-party wallet like Phantom (for Solana Devnet).
- Ensure you’re connected to the correct devnet by selecting the correct details and the screenshots below.
- You can request testcoins directly from us. And if you already have previously, they will appear here after you have switched to Testnet and added the token address.
| Navigate to the icon at the top left corner -> | Select "Settings" -> | Enter "Developer" at the search bar -> | Turn on "Testnet Mode" |
|---|---|---|---|
-d70f53acecd4ed99af0182fadbaf0427.png) | -202bcd3d2a9c472a17b791d247db4a02.png) | -28941de3b4d74c1f4f5956b6a10e7271.png) | -e46beaaadfd099e58fc86f08e17725db.png) |
| Testcoin | Token Contract Address |
|---|---|
| APUSDT | 6krZNyyrvgN1XdvLVZwoAY4UvZxgiYVLtJwLYt43GHym |
| APUSDC | 7gZkdXQcNzfw4eDJvgN4XuPxBnsf2AyRnjga4XQ7ber8 |
Faucet
Tron-SHASTA testcoins
During testing and local development, you need cryptocurrency on the testnets to do anything meaningful. If you require testcoins, the official Tron Discord or Tron Telegram provides users with either 5000 TRX or USDT on Shasta every 24 hours.
For Discord:
-
Simply verify your Discord account in the server, head on over to the #faucet-test-coins channel.
-
!shasta [L1 TRON ADDRESS] or !shasta_usdt [L1 TRON ADDRESS]
Example: !shasta_usdt TGajNwE1LPrbaGdtHs3mN29bTVdQrcz8ep
- and send it into the channel to receive your testcoins.
For Telegram:
-
Simply input !shasta [L1 TRON ADDRESS] or !shasta_usdt [L1 TRON ADDRESS]
Example: !shasta_usdt TGajNwE1LPrbaGdtHs3mN29bTVdQrcz8ep
- and send it into the channel to receive your testcoins.
Ethereum-SEPOLIA testcoins
Please contact us and send us your Ethereum address to request for testcoins.
BNB Smart Chain (BNB Smart Chain Testnet) testcoins
Please contact us and send us your BNB Smart Chain (BSC) address to request for testcoins. If you are using MetaMask, the address should be the same as your Ethereum address.
Solana Devnet testcoins
Please contact us and send us your Solana address to request for testcoins.